I was running UmbrelOS on Raspberry Pi, with an external 2TB SSD disk. The machine is obviously under powered and started to show weakness. So I decided to migrate to a Lenovo mini-PC, M710q.
I need to re-use the same the SSD disk because M710q doesn’t have enough storage by itself (500GB). Ideally I can keep all the blockchain data and setup, so that I don’t have re-sync everything and re-setup everything.
While this may sound like a common question, I did not find many answers on the internet. The closest one is this one. However, UmbrelOS is currently at v1.x. A lot of don’t apply anymore.
Below is how I did it.
Prepare SSD disk
Upgrade Raspberry Pi to the latest UmbrelOS v1.1.
Shut it down via Umbrel Settings and unplug SSD disk.
cd /home/umbrel; mv umbrel umbrel.bak; ln -s /mnt/umbrel-ssd/umbrel umbrel
sudo systemctl start umbrel
It will take a long to re-start umbrel since it will fetch various containers etc. But it will use the same blockchain and other app-specific settings you had before on SSD disk. After a couple of coffee time, you will be all set!
[Updated on 2/2, 2025, after setting TailScale on RT2600AC and seeing this post]
TailScale is great VPN. It is even greater if it runs all the time on a router! Currently it is available as 3rd party package for Synology NAS (X64-based) machines, but not for Routers (usually ARM64-based). *sigh* This blog talks about a way to set it up.
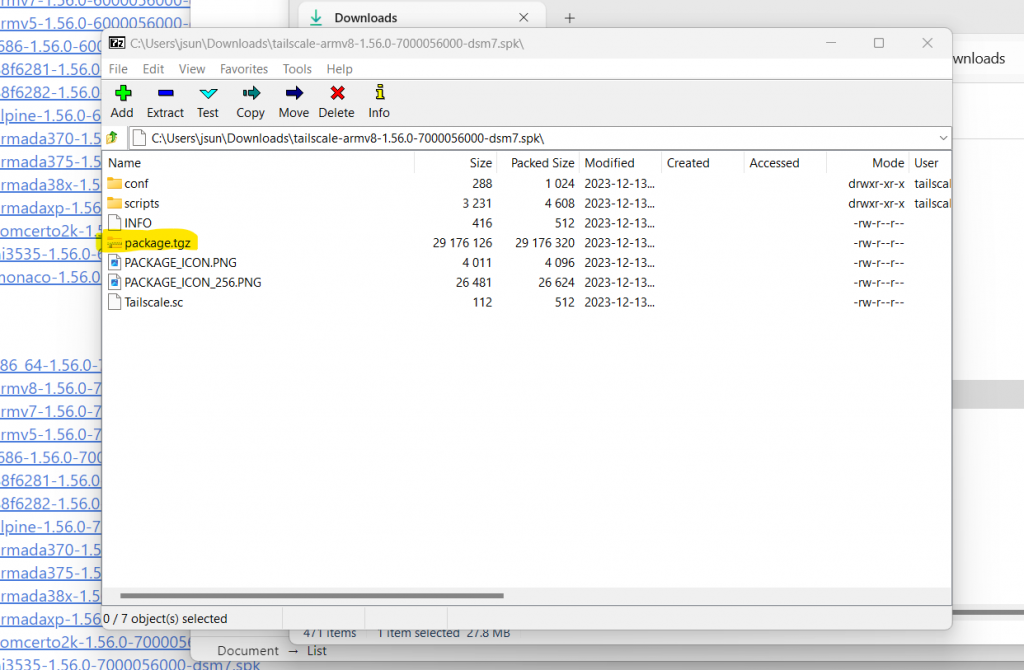
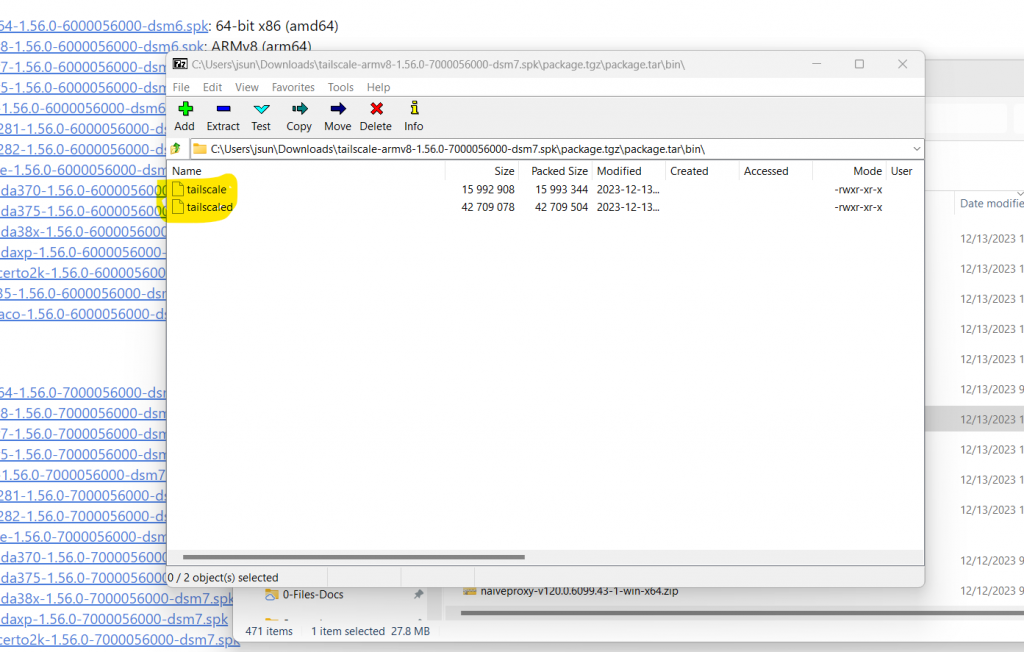
Note for RT2600AC we need to choose the armv7 version (32bit arm)
Untar or unzip the package a couple of times and extract two binary files, tailscale and tailscaled. See pictures below.
Copy (scp) over these two files to Synology router, say under your home directory’s subdirectory, “tailscale”.
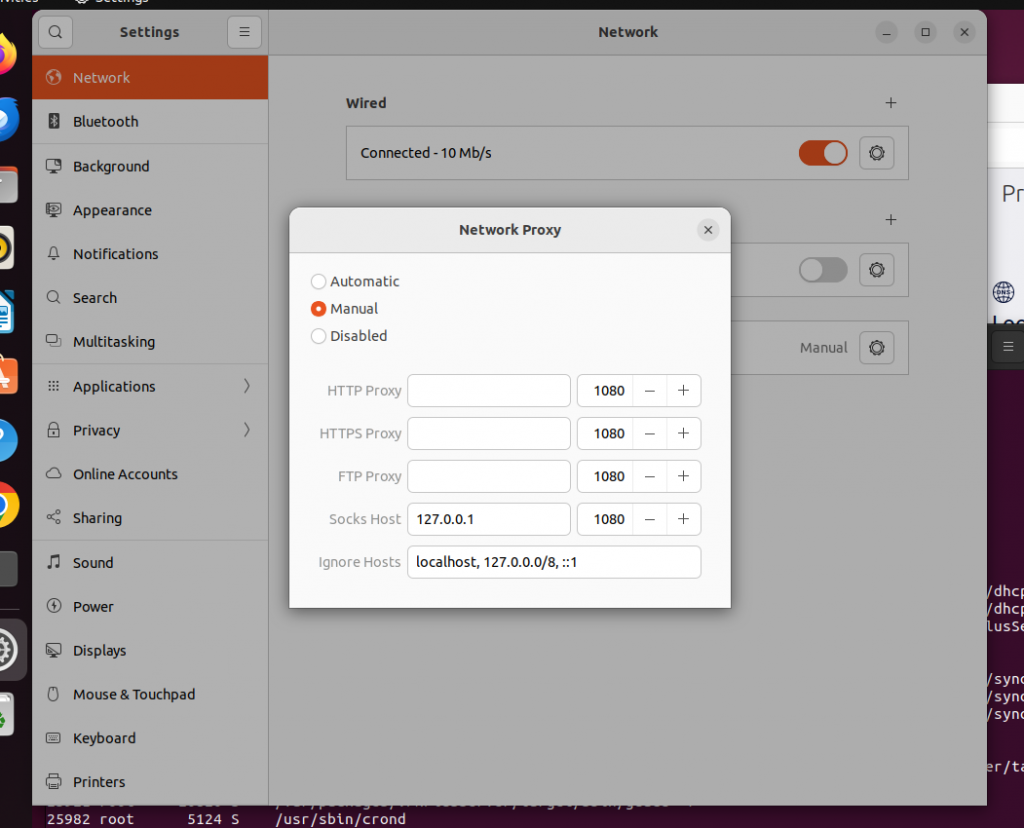
Testing
Download the script below that starts/stops the tailscale daemon
This script is derived from TailScale’s original script and is adapted to SRM environment
MODIFY SCRIPT with your own path for PKGVAR variable
Now type “./start-stop-status start” and “./start-stop-status status”
For the first time running, type “./tailscale --socket tailscaled.sock up --advertise-exit-node --advertise-routes 172.30.1.0/24″ and perform web-based login/setup, which will
connect to your tailscale account and join your VPN network;
advertise itself as exit node (router to internet) (if needed);
It’s pretty stupid and annoying (maybe intentional?) that AWS provides DNS service (Route 53) but does not provide dynamic DNS to its own instances!!! This blog describes a method to achieve just that with various AWS features, namely EC2 instance events, Lambda functions and Route 53.
Specifically,
You must already host some domains with Route 53
You like to launch EC2 instances with public IP addresses
You like to assign some cool domain names to those EC2 instances, automatically
When those instances are stopped, you like those domain names are removed automatically
I have done this for over 5 or 6 years now. The blog is an attempt to capture what I did and keep my memory fresh! The approach was based on some early articles, most likely an early version of this one. However, I spent time to develop my own version which has diverged significantly now. For example, my version supports multiple domains and doesn’t use database. Also my blog will focus on using AWS console operations instead of using CLI.
Usage
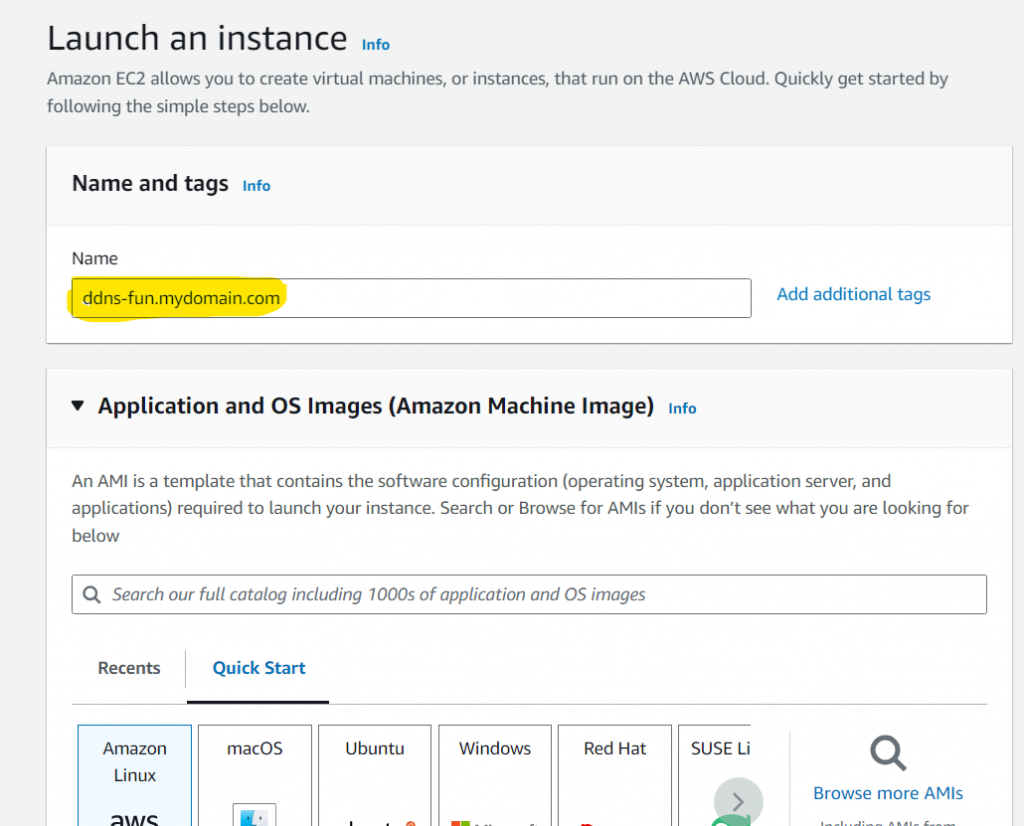
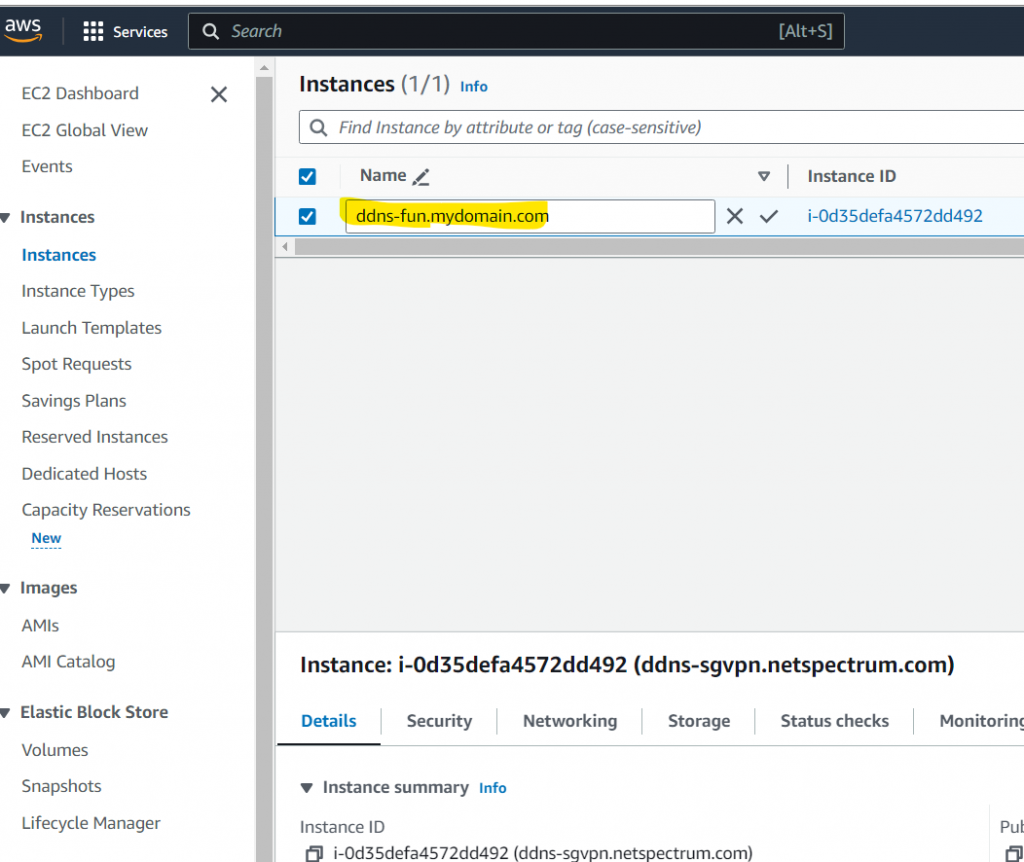
Suppose you own a domain called mydomain.com and you are hosting it with Route 53. When you launch an EC2 instance, you can set the name tag as “ddns-fun.mydomain.com” during launch or startup time. See pictures below. After the instance starts running, you will automatically have a A-type DNS record “fun.mydomain.com” pointing to the instance’s IP address.
During EC2 launch
After EC2 launch
When you stop or terminate the instance, the DNS record will be removed automatically.
Overview of the process
It is relatively complicated. Below is an overview.
The central piece is a lambda function written in Python 3.x called ddns_lambda. This function will receive events when EC2 instances are started or stopped. It will examine the name tag or DNS records to determine whether it should add some DNS records or remove them.
In order for the ddns_lambda to run with right permissions and access the recourses, you will create an IAM policy, called ddns-lambda-policy and an IAM role, called ddns-lambda-role.
Lastly you will create an event triggering rule that monitors EC2 instance start/stop. When such event happens, ddns_lambda function will be called.
Let us dive in!
Create a policy for DDNS lambda role
Go to AWS/Services/IAM/Policies
Click on “Create policy” on the top-right
On “Specify permissions” page, choose JSON option and enters following code. The policy allows access to ec2 instance query, write logs, and full access to route53.
China great firewall is having a dreaded effect on my decision whether I should go visit. With a typical hacker fashion I decided to roll my own sleeves and take the matter under my own control – set up my VPN servers.
A long story short, two solutions emerge, OpenVPN and NordVPN meshnet. Both have some commercial backing. So it is not exactly under my own control in some sense, but the solutions are all free. This article talks about NordVPN meshnet.
Set up VPN Server on AWS Ubuntu 22.04
I mostly follow this page that describes well. Below are the the commands I used.
<register nordvpn account>  # max 10 devices are allowed

sh <(curl -sSf https://downloads.nordcdn.com/apps/linux/install.sh)

nordvpn login --token
nordvpn set technology nordlynx
nordvpn set meshnet on
nordvpn mesh peer list

nordvpn mesh peer inv send <email>  # invite others

nordvpn mesh peer routing allow <peer node>  # allow others to connect and route

# to stop/disable nordvpn
sudo systemctl disable --now nordvpnd

# to uninstall nordvpn
sudo apt-get --purge remove 'nordvpn*'
Set up on Ubuntu Client
The primary source information is at this page. Below are commands I used
<register nordvpn account>

sh <(curl -sSf https://downloads.nordcdn.com/apps/linux/install.sh)

nordvpn login --token
nordvpn set technology nordlynx
nordvpn set meshnet on

# accept invitation, if using other's server
nordvpn mesh inv list
nordvpn mesh inv accept <email of Server user, if needed>

# connect and route internet traffic via meshnet VPN server
nordvpn mesh peer list
nordvpn mesh peer connect <server node>

# status and disconnect
nordvpn status
nordvpn disconnect
Other platforms are most likely similar, but I have not tried them. See iOS page and macOS page. Note if you use someone else’s VPN servers, you will need to accept their invitation first so that you can see their servers on your peer list.
Also note NordVPN is mixing meshnet features with their own paid VPN services, which make the UI very confusing. Just follow this guide and steer clear from the paid subscriptions.
CPU2006 is an old obsolete benchmark. But in modern days we may still need to build and run it. The biggest problem is usually in building the tools needed by benchmark itself, called spec tools.
Below are the steps I used to build spec tools for AArch64 (64bit ARM) and RISC-V 64 on Ubuntu OS (22.04 and 23.04).