How to Build/Run Android Cuttlefish Emulator on PC/ARM64

Cuttlefish is new virtual-machine based Android emulator. It uses virtio devices instead of emulated devices as in original Android emulator.   As such, it needs lighter VM support (to the extent it can run on ARM64 host), unlike Android Emulator which requires heavily modified QEMU to emulate various devices.  The virtio architecture can potentially offer better performance as well.

Refer to  a slide deck on cuttlefish.  Or find a local copy of it at here.

Many thanks to Alistair Delva from Google, who provided many technical guidance in going through this exercise.

How to Build/Run Cuttlefish on PC (X86_64)

My host Ubuntu 18.04.  Refer to https://source.android.com/setup/build/building

Build and install cuttlefish-common package

git clone https://github.com/google/android-cuttlefish.git 
cd android-cuttlefish
dpkg-buildpackage --no-sign
  • Install :
dpkg -i  ../cuttlefish-common_0.9.9_amd64.deb
  • it requires dnsmasq-base and a few other packages; install them as requested
  • Check status  with  /etc/init.d/cuttlefish-common status

Build cuttlefish

  • Checkout AOSP pie-gsi branch.
repo init -u https://android.googlesource.com/platform/manifest -b pie-gsi repo sync -j 8
source build/envsetup.sh
lunchaosp_cf_x86_64_phone-userdebug
make

Run cuttlefish

  • Add user to proper groups before running; power off machine; then power on again.  (Strange, rebooting did not seem to work somehow).  You may need to run “sudo apt install qemu-kvm” if you get error, “group kvm doesn’t exist”.
sudo usermod -aG kvm $USER
sudo usermod -aG cvdnetwork $USER
  • Run: launch_cvd
  • Install tightvnc to view phone
    • download tightvnc viewer (jar file): https://www.tightvnc.com/download.php
    • install java if not done yet:  sudo apt install openjdk-11-jre
    • java -jar tightvnc-jviewer.jar  #use 127.0.0.1:6444
  • Run stop_cvd to kill the cvd

How to Build/Run Cuttlefish on ARM64

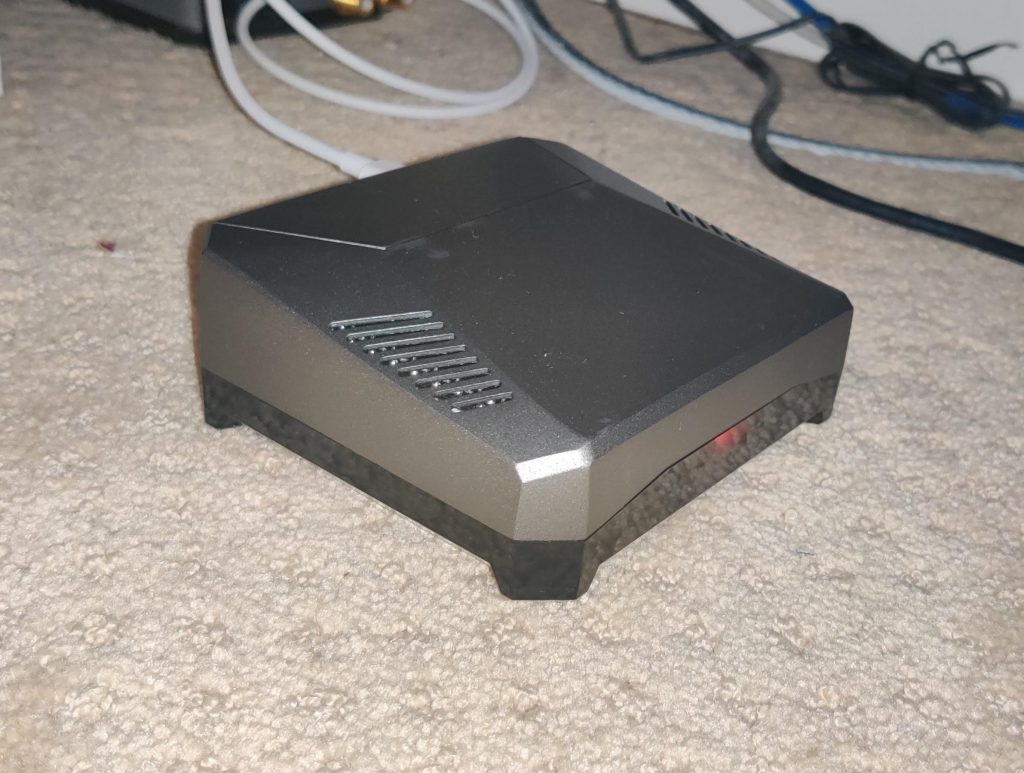
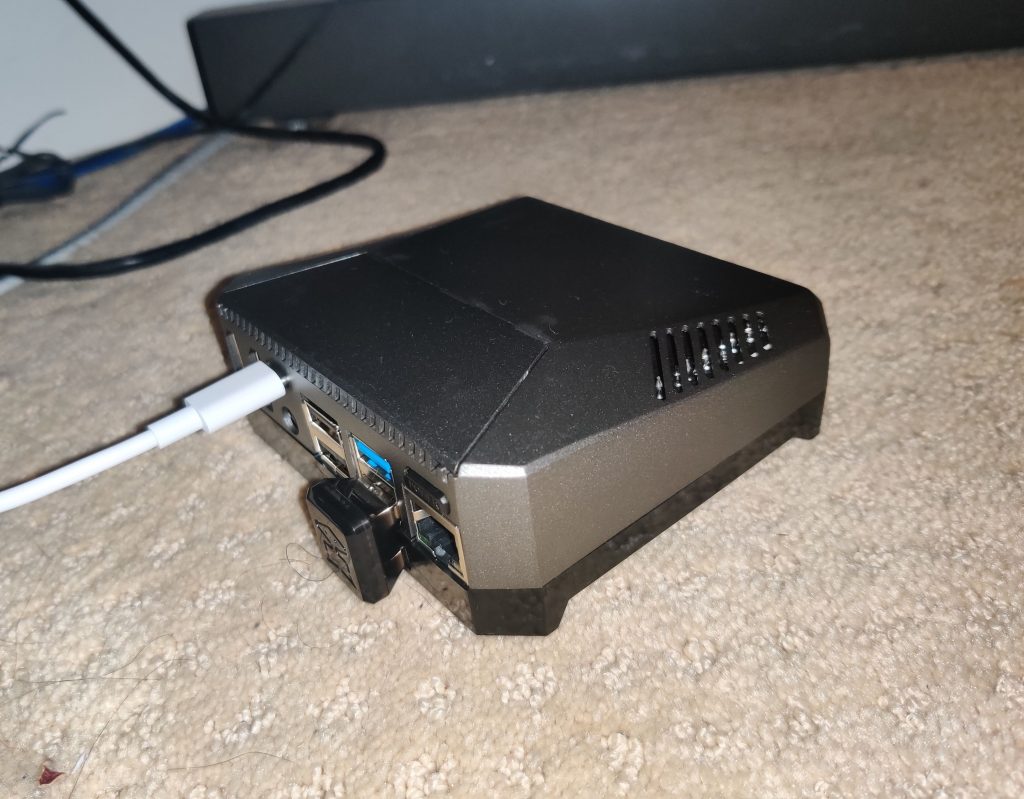
My ARM64 board is rockpro64, running ubuntu 18.04.

[on X86_64] Cross-build cuttlefish for ARM64

  • Similar as above, except build with a different target and with distribution packages
lunch aosp_cf_arm64_phone-userdebug
make dist

Note the following output files, which need to be copied to ARM64 host

out/dist/aosp_cf_arm64_phone-img-eng.jsun.zip
out/dist/cvd-host_package.tar.gz

[on X86_64] Configure and build arm64 kernel

You will need CONFIG_BINFMT_MISC.  Otherwise below step will fail.  Check /proc/sys/fs/binfmt_misc to be sure.

In addition, you will need a few other kernel configs, which according to Alistair are only supported in kernel after 4.9.  Here is the set of configs I added to rockpro64 default v5.2 kernel.

CONFIG_BINFMT_MISC=y
CONFIG_EVENTFD=y
CONFIG_VSOCKETS=y
CONFIG_VHOST_NET=m
CONFIG_VHOST_SCSI=m
CONFIG_VHOST_VSOCK=m
CONFIG_VHOST=m
CONFIG_VIRTIO_BLK_SCSI=m
CONFIG_VIRTIO_INPUT=m
CONFIG_VIRTIO_MMIO_CMDLINE_DEVICES=y
CONFIG_VIRTIO_VSOCKETS_COMMON=m
CONFIG_VIRTIO_VSOCKETS=m

In specific, here are the exact commands I used to build my rockpro64 kernel on my PC ubuntu:

git clone https://github.com/ayufan-rock64/linux-mainline-kernel.git
cd linux-mainline-kernel/
git checkout -b 5.2.0-1116-ayufan-js 5.2.0-1116-ayufan
vi arch/arm64/configs/rockchip_linux_defconfig    # add the above configs to the end
vi dev.mk   # BUG? change HOSTCC=aarch64-linux-gnu-gcc to HOSTCC=gcc
./dev-make kernel-image-and-modules
./dev-make kernel-package

Copy over the .deb package file to arm64 host and install with “dpkg -i <pkg file>” command.  Reboot afterwards.

[on ARM64] Setup to run x86_64 binaries

Do following as root user:

apt install qemu-user-static
dpkg --add-architecture amd64
[You may need to correct /etc/apt/source.list file here.  See an example at this link]
apt install libc6:amd64

After this you should be able to run simple x86_64 binaries such as “cat”.  Give it a try.

[on ARM64] Build and install cuttlefish-common package

This is similar to x86_64 case, except that you do this step on ARM64 host.

The following packages are needed before you can install cuttlefish-common:

apt install bridge-utils libarchive-tools libfdt1 python iptables

[on ARM64] Setup and run cuttlefish

  • copy the following  the files from x86_64 PC host:
out/dist/aosp_cf_arm64_phone-img-eng.jsun.zip
out/dist/cvd-host_package.tar.gz
  • untar and unzip them into 2 directories, say /home/jsun/work/cuttlefish/host and /home/jsun/work/cuttlefish/image
  • Add user to proper groups before running; power off machine; then power on again.  You may need to create kvm group first and make sure  /dev/kvm is read/writable by kvm group
sudo usermod -aG kvm $USER
sudo usermod -aG cvdnetwork $USER
  • Run the following commands to start cuttlefish
export ANDROID_PRODUCT_OUT=/home/jsun/work/cuttlefish/image/
export ANDROID_HOST_OUT=/home/jsun/work/cuttlefish/host/
export PATH=$PATH:$ANDROID_HOST_OUT/bin
launch_cvd -decompress_kernel=true
  • The rest are similar to x86_64 case

Appendix – Install Ubuntu Desktop on ARM64

Many ARM64 ubuntu distros are minimal or server, which means no desktop included.  It is easy to install one.  However, without a few key steps (see first a few commands below),  you can easily get some headaches.

Below are the commands I used to install Xubuntu on rockpro64, starting from their minimal Ubuntu 18.04 distro.

  1. Download Ubuntu 18.04 minimal img for SD card (refer to this page),
  2. Copy to SD card
dd if=./bionic-minimal-rockpro64-0.8.3-1141-arm64.img of=/dev/sdb bs=4M
  1. Use parted or gparted to expand /dev/sdb7 to take over whole SD space
  2. Boot up rockpro64:
sudo su
locale-gen
localectl set-locale LANG="en_US.UTF-8"
apt update
apt install -y xubuntu-desktop 

How to Trio-Boot Linux/Windows

Background

As a typical programmer, my working environment is Linux (compiling, building and debugging).  Meanwhile my digital social life also depends on Windows (Skype, games, etc).  When you buy a new laptop, like I just did with Lenovo T490S, a big question is how to make both ends happy.

Common solution such as dual booting does not quite cut it because the context switching overhead is too big.  VM solution like VMware player or virtual box is another common solution, which gets pretty close.  You loose about 15% to 25% performance in Linux VM but you can access both of them at the same time.

I like to push the envelop a little bit further and implemented something what I call as Trio-boot:

    • You can dual-boot into either Linux or Windows host
    • Once you are in windows host OS, you can also use VMware Player to boot the *same* Linux as guest OS

By doing this it has the convenience of VM solution, while also preserves the performance and compatibility of native Linux host if needed.  Note whether you boot natively or start from VMware player, it is the same Linux environment, which is very important.

Steps At-a-Glance

  • Prepare Windows to leave disk space for Linux partition
  • Install Linux (e.g., Ubuntu 18.04) to the spare space and do dual booting
  • Boot into Windows and install VMWare Player 15
  • Create a 64bit Linux VM that includes a virtual disk (/dev/sda) and native Linux partition on the physical disk

Prepare Windows

  • Start “Create and format disk partitions” from “Control Panel”
  • Shrink the main windows partition to leave sufficient space for Linux
    • If the PC has been used for a while, you may find some non-movable files that prevent you from shrinking sufficient amount.  Google around for solutions.

Install Ubuntu 18.04

  • Download 64bit Ubuntu ISO image (https://ubuntu.com/download/desktop )
  • Use rufus to burn a Ubuntu 18.04 USB disk (16+GB) (https://rufus.ie/ )
  • Boot PC with Ubuntu 18.04 USB disk
  • Choose “Install Ubuntu” option when prompted
  • At “Install Type” page, choose “Something else” (See https://i.stack.imgur.com/KURnS.png)
  • Create a new partition to have ext4 fs type and mounted as root “/”
    • In my case it create a new partition called “nvme0n1p5”
  • Continue installation as usual

At the end you should be able to dual-boot Windows and Ubuntu

Start Ubuntu in VMware Player

The key of this step is to add 2 disks to the VM: 1 virtual disk which will install MBR and serves as the boot disk, and 1 physical partition that holds Linux which is already installed.  A theoretically simpler solution is to add both EFI partition and Linux to the VM and don’t use a virtual disk.  However, this approach does not always work.

  • Boot into Windows and install VMware Player
  • Create 64bit Linux VM with 0.1GB virtual disk
    • add a second hard disk, which is physical disk and select only Linux partition
    • I chose NVMe disk type to match my physical disk type, but that probably does not matter
  • Boot VM with Ubuntu CD image with “Try Ubuntu” option
  • Change root to native Linux partition
    • mount /dev/nvme0n1p5 /mnt
    • mount -B /sys /mnt/sys
    • mount -B /proc /mnt/proc
    • mount -B /dev /mnt/dev
    • chroot /mnt
    • fdsik -l   # it should show /sda/ as well as the nvme0n1 disk partitions
  • remove auto mount of EFI partition (since it is not available in VM enviroment of Linux)
    • vi /etc/fstab
    • add “#” to the line that contains “/boot/efi”
  • prepare /dev/sda
    • fdisk /dev/sda
    • create a new primary partition with default values, i.e., a linux partition that takes over the whole disk
      • Note by default it will initialize the disk partition table as a DOS-type disk with MBR boot.  Keep this setting.
  • Install grub on /dev/sda, grub-install /dev/sda
  • power off VM; disconnect CD-ROM; restart VM, and choose Ubuntu as startup OS
  • (optional) install vm tools to enable copy’n’paste and resizing desktop, etc
    • sudo apt install open-vm-tools open-vm-tools-desktop
  • (optional) Mount hgfs automatically on every boot
    • create /etc/rc.local file with the following code
#!/bin/bash
vmhgfs-fuse .host:/ /mnt/hgfs/ -o allow_other -o uid=1000
    • add executable attribute, “sudo chmod +x /etc/rc.local”
    • enable /etc/rc.local, “sudo systemctl enable rc-local”
  • restart VM

TIPS

  • always shut down VM completely before rebooting into Linux natively.  Otherwise you will be left with some inconsistent harddisk state.

Additional notes on 9/22, 2019

In my original settings, computer will boot from grub2, where I can choose to start windows or ubuntu.  Quite a few times, for some unknown reasons, the computer boot Ubuntu straight, which can cause some disasters if your windows’ vmplayer is playing the same ubuntu image and windows went hibernation.

To overcome this, I finally settled on the following:

  • Enter BIOS and set windows boot manager as the default startup OS.
    • I need to press ENTER + F12 on my Dell machine in order to boot Ubuntu natively
  • in Windows vmplayer, I edit grub.cfg and remove windows so that vmplayer would always boot up Ubuntu

Build Vyatta AMI

Overview

The following are the major steps involved:

  1. Build 64bit Vyatta ISO image
  2. Install the ISO image to a virtual machine and obtain the root FS image
  3. Modify the above root fs image to adapt to AWS EC2 environment (dark magic, haha)
  4. Create EBS-based AMI from the above modified root fs image

Build 64bit Vyatta ISO image

My starting points are two places:

  1. The README file from vyatta repository. It gives very good instructions on building the vyatta.
  2. This site has developed a script that builds vyatta from source, basically following the above instructions. The only difference is that they were building for 32bit while we are building for 64bit.

This script is my final script used to build the ISO image. A couple of points noted below:

  1. You need a debian 64bit build machine. I used debian 6.0.9. See my debian setup at the end of this page.
  2. I used vyatta daisy branch, which is v6.6r1. See here for more vesioning details
  3. The 64-bit version already has a kernel configured for running on virtual machines (specifically Xen, which is same as AWS EC2). However, for 32-bit versions, one needs to modify build-iso/pkgs/linux-image/debian/rules.gen to use i386/config.586-vyatta-virt instead of i386/config.586-vyatta. The config file appears three times (for setup, build, binary). I don’t understand, just modify them all.

Install ISO

This is relatively straightforward. To save space, I installed the ISO on a 2GB hard disk with VMWare Workstation.

  1. I boot up the VM with liveCD
  2. Log in with “vyatta”/”vyatta”.
  3. Type in “install system”. This will install Vyatta into the hard disk
  4. I boot up the virtual machine with a liveCD (actually the ISO itself) again. Then do something like

    dd if=/dev/sda of=<my root fs image> bs=1M

Modify the root fs image

A lot of try-n-error and dark magic happen in this step. I will try to cover as much as possible.

Mount the root fs image under /mnt/ec2-image

mount -oloop /opt/ec2/images/vyatta-64bit.img /mnt/ec2-image/

Create menu.lst for pv-grub

Create /mnt/ec2-image/boot/grub/menu.lst (Note the suffix is “L”-st, not “One”-st)

default=0
timeout=0
title Jun Vyatta 64bit
root (hd0)
kernel /boot/vmlinuz-3.3.8-1-amd64-vyatta ro root=/dev/xvda1 console=hvc0 rd_NO_PLYMOUTH
initrd /boot/initrd.img-3.3.8-1-amd64-vyatta

Fix /etc/fstab

vi /mnt/ec2-image/etc/fstab

/dev/xvda1  /           ext4         noatime           0    1
/dev/xvda3  swap        swap         defaults          0    0

Fix vyatta config

vi /mnt/ec2-image/opt/vyatta/etc/config/config.boot. Main changes are a) remove eth0 MAC address, b) add sshd service, c) change console

nterfaces {
    ethernet eth0 {
        address dhcp
    }
    loopback lo {
    }
}
service {
    ssh {
        port 22
    }
}
system {
    config-management {
        commit-revisions 20
    }
    console {
        device hvc0 {
            speed 9600
        }
    }
    host-name vyatta-64bit
    login {
        user vyatta {
            authentication {
                encrypted-password $1$2LZU31YS$ShE9ovJPjaJGZDCw9iLW20
            }
            level admin
        }
    }
    ntp {
        server 0.vyatta.pool.ntp.org {
....

Set up ssh key access for ‘vyatta’ user

  1. Copy/install /mnt/ec2-image/etc/init.d/ec2-ssh-key
  2. Copy/install /mnt/ec2-image/opt/vyatta/sbin/vyatta_config_ssh
  3. ln -s ../init.d/ec2-ssh-key /mnt/ec2-image/etc/{rc2.d,rc3.d,rc4.d,rc5.d}/S05ec2-ssh-key
  4. Change “CONCURRENCY” to “none” in /mnt/ec2-image/etc/rc file.

Also remove default password for ‘vyatta’ user in /mnt/ec2-image/etc/passwd file.

vyatta:x:1000:100::/home/vyatta:/bin/vbash

Create initial host SSH key

Add the following to the /mnt/ec2-image/etc/rc.local file:

#
# [jsun] generate host key if not available
#
if [ ! -f /etc/ssh/ssh_host_key ]; then
        dpkg-reconfigure openssh-server
fi

/sbin/ifconfig

exit 0

Don’t remember hw-id for eth0

This feature screws up AMI instace each time it is stop and re-started, because the eth0 hw-id will be different. A simple solution is to not remember it at all.

--- backup/opt/vyatta/sbin/vyatta_interface_rescan	2014-03-25 16:53:02.000000000 -0700
+++ /mnt/ec2-image/opt/vyatta/sbin/vyatta_interface_rescan	2014-03-25 15:41:02.505167405 -0700
@@ -132,7 +132,8 @@
 	my $ifpath = interface_type($ifname) . " $ifname";
 
 	syslog(LOG_INFO, "add config for %s hw-id %s", $ifname, $hwaddr);
-	$xcp->create_node(['interfaces',$ifpath,"hw-id $hwaddr"]);
+	#$xcp->create_node(['interfaces',$ifpath,"hw-id $hwaddr"]);
+	$xcp->create_node(['interfaces',$ifpath,"address dhcp"]);
 
 	# Add existing phy entry for wireless
 	if ($ifname =~ /^wlan/) {

Create AMI images

Even though we got a perfect FS image above for AMI, there is no easy way to create one. *sigh*

The theory

Vyatta is using its own Linux kernel. We are relying on a AWS EC2 feature, called, PV-GRUB. We use the AKI for 64bit and partionless disk (hd0 version).

We rely on a AMI build host in AWS that helps us to create a volumn with all the root fs image content. We then create an snapshot from the volumn, and then create AMI from thsnapshot. We then copy the AMI to the targeted regions, if they are different from the build host.

Note that we will ssh into the build host. It is much more convenient if we set up key-based access to the build host. Also the login user must be in “disk” group.

We use the ec2 tool PHP SDK. Please install that first.

The script

The PHP script used to create the AMI is listed here.

Run this script from local host (e.g., the debian 6 vyatta build host). The usage is pretty simple

  1. ./create-ebs-image.php –delete-image : will delete AMI image in the target regions.
  2. ./create-ebs-image.php –delete-snapshot: will delete both AMI image and snapshots in the target regions.
  3. ./create-ebs-image.php –run : will create and deloy AMI images from the local root fs image

How to update a single package

One does not need to go through the above steps if he/she wants to change some source code of a package. Instead, if you already have build vyatta ISO environment and an EC2 instance running the vyatta AMI, use the following procedure.

  1. modify the source code of a pkg, e.g., vyatta-bash. (BTW, all pkgs are under build-iso/vyatta/build-iso/pkgs.)
  2. clean the pkg : tools/submod-clean -d vyatta-bash
  3. re-build .deb package file: tools/submod-mk vyatta-bash
  4. upload pkg to EC2 instance: scp -i <ssh pem> vyatta-bash_999.dev_amd64.deb vyatta@<ec2 ip address>
  5. install the package: sudo dpkg -i vyatta-bash_999.dev_amd64.deb

TODO

  1. It would be good we can modify the vyatta build process and obtain the installed root fs image directly, instead of going through installing ISO and copy root disk steps.

Appendix

Set up Debian 6 build host

- debian 6 net iso install VM;
	system utilities
	ssh server
	graphic install

- install kernel header 
	sudo apt-get install linux-headers-$(uname -r)

- install vmware-tools

- install build packages
apt-get install       ssh build-essential sudo bzip2 curl autoconf git devscripts \
      debhelper autotools-dev automake libtool bison flex lintian \
      libglib2.0-dev libapt-pkg-dev libboost-filesystem1.42-dev \
      libncurses5-dev libdb-dev libssl-dev cdbs libmozjs-dev \
      libreadline5-dev libpam0g-dev libcap-dev libsnmp-dev gawk unzip \
      kernel-package libatm1-dev git-buildpackage libnfnetlink-dev \
      libnetfilter-conntrack-dev libattr1-dev rsync libxml2-dev \
      libedit-dev libpcap0.8-dev libpci-dev lsb-release quilt ruby \
      genisoimage liblzo2-dev unifont libpopt-dev libgmp3-dev \
      libcurl4-openssl-dev libopensc2-dev libldap2-dev libkrb5-dev \
      hardening-wrapper libgcrypt11-dev libpcre3-dev libprelude-dev \
      libgnutls-dev libperl-dev python-all-dev python-setuptools \
      live-helper syslinux libsort-versions-perl libexpat1-dev \
      libfile-sync-perl gcc-multilib libfreetype6-dev libusb-dev \
      libdevmapper-dev libmysqlclient-dev autogen libdumbnet-dev

Build CentOS 6 AMI

Overview

This is a faithful translation of the excellent tutorial by Jeff Hunter to BASH script. However, the result is so useful that I felt it is meaningful to share. 🙂

If you are patient enough, you should read the tutorial for all the gory details. If you are not, just follow the steps below. If you are lucky, you can build a CentOS 6 AMI in a hurry.

Pre-requisites

    1. CentOS build host: Should have at 10GB extra space
    2. Install host tools:
yum -y install e2fsprogs ruby java-1.6.0-openjdk unzip MAKEDEV
    1. Install AWS tools:

# mkdir -p /opt/ec2/tools
# curl -o /tmp/ec2-api-tools.zip http://s3.amazonaws.com/ec2-downloads/ec2-api-tools.zip
# unzip /tmp/ec2-api-tools.zip -d /tmp
# cp -r /tmp/ec2-api-tools-*/* /opt/ec2/tools

# curl -o /tmp/ec2-ami-tools.zip http://s3.amazonaws.com/ec2-downloads/ec2-ami-tools.zip
# unzip /tmp/ec2-ami-tools.zip -d /tmp
# cp -rf /tmp/ec2-ami-tools-*/* /opt/ec2/tools

The script

You can find the script here.

Note you need to configure the following parameters at the beginning the script. Most certainly you need to supply EC2_PRIVATE_KEY, EC2_CERT, AWS_ACCOUNT_NUMBER, AWS_ACCESS_KEY_ID, AWS_SECRET_ACCESS_KEY, EC2_KEYPAIR, EC2_SECURITY_GROUP.

export JAVA_HOME=/usr
export EC2_HOME=/opt/ec2/tools
#export EC2_URL=https://ec2.amazonaws.com
export EC2_URL=https://ec2.us-west-1.amazonaws.com
export EC2_PRIVATE_KEY=/home/jsun/files/aws-nsp-x509-pk-4USZFXUMLDXAV5Q3BNUUYPURLA6VZWRH.pem
export EC2_CERT=/home/jsun/files/aws-nsp-x509-cert-4USZFXUMLDXAV5Q3BNUUYPURLA6VZWRH.pem

export AWS_ACCOUNT_NUMBER=XXXXXXXXXX
export AWS_ACCESS_KEY_ID=XXXXXXXXXX
export AWS_SECRET_ACCESS_KEY=XXXXXXXXXX
export AWS_AMI_BUCKET=vyatta-ami/x86-64/Linux/CentOS/6.5

IMG_BASE_NAME=centos-6-x86_64
S3_REGION=us-west-1
AMI_PVGRUB=aki-f77e26b2
EC2_KEYPAIR=XXXX
EC2_SECURITY_GROUP=XXXX

Also note you may need to change AMI_PVGRUB depending on the region and architecture. Refer to the tutorial for details. Here is a list of them for us-west-1:

root@localhost ~]# ec2-describe-images --owner amazon --region us-west-1 | grep "amazon\/pv-grub-hd0" | awk '{ print $1, $2, $3, $5, $7 }'
IMAGE aki-960531d3 amazon/pv-grub-hd00_1.04-i386.gz available i386
IMAGE aki-920531d7 amazon/pv-grub-hd00_1.04-x86_64.gz available x86_64
IMAGE aki-8e0531cb amazon/pv-grub-hd0_1.04-i386.gz available i386
IMAGE aki-880531cd amazon/pv-grub-hd0_1.04-x86_64.gz available x86_64
IMAGE aki-e97e26ac amazon/pv-grub-hd00_1.03-i386.gz available i386
IMAGE aki-eb7e26ae amazon/pv-grub-hd00_1.03-x86_64.gz available x86_64
IMAGE aki-f57e26b0 amazon/pv-grub-hd0_1.03-i386.gz available i386
IMAGE aki-f77e26b2 amazon/pv-grub-hd0_1.03-x86_64.gz available x86_64

If you are lucky, run the scrip the following order, and you should have a CentOS instance running in AWS. 🙂


commands:
  init     : perform teardown and create new img file/dirs, set up yum
  setup    : mount image, bind run-time dirs
  install  : install centos image (after setup)
  configure: configure the OS img (after install)
  teardown : unbind and un-mount
  bundle   : build img bundle for upload (after install/configure/teardown)
  upload   : upload image (after bundle)
  register : register AMI (after upload)
  run <id> : run a small instance of the registered AMI

Find out the IP address of the new instance, and ssh into it

ssh -i my_aws.pem root@<pub ip address>

Tricks and Tips

  1. It takes long time (>2 minutes) for the instance to boot up. Be patient. And don’t panic too soon.
  2. If somehow you cannot log into the instance with the key pair, you can always pre-create /root/.ssh directory in the OS image and pre-create the authorized_keys file underneath it.