
Setup NaiveProxy Server
NaiveProxy is an unique tool that can potentially escape the most strict censorship firewall. I thought I would give it a try.
Setup the server
This is actually the simple part.
- Follows this page to create a Caddyfile (See “Server setup”)
- Go to this page to download the binaries you need
- Follows this page to set up a systemctl service.
Set up client on Ubuntu
Client side is a little bit tricky and cumbersome to use.
- Go to this download page to download the right naive client
- For x64 based PC, it should be something like naiveproxy-v120.0.6099.43-1-linux-x64.tar.xz
- Extract “naive” binary
- Follow the readme page and create config.json file in the same directory
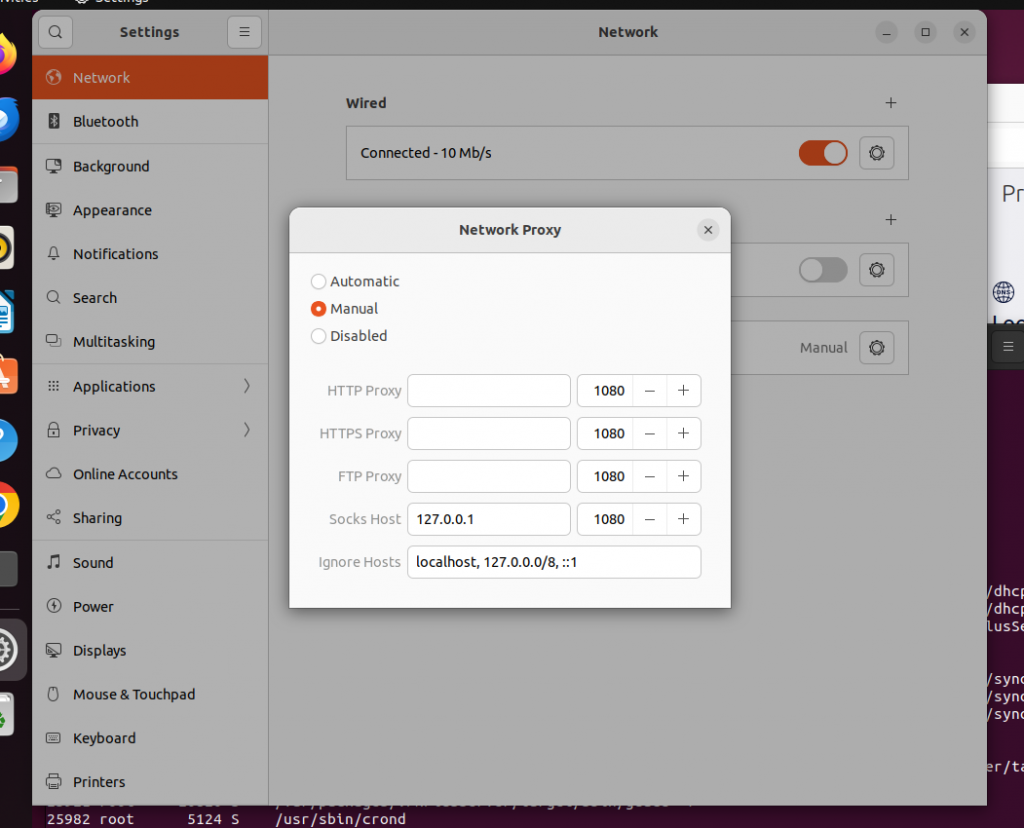
- Open Ubuntu Settings/Network/Network Proxy
- Choose “Manual”, and fill in “127.0.0.1:1080” for “Socks Host”, while leaving others empty (IMPORTANT!) See picture below.
- After that, download and start to use “start-naive” and “stop-naive” scripts to switch between using and not using proxy.
- Note only browsers work with this scheme
- And it seems only Chrome is working while Firefox is not working (bug?)
Setup TailScale VPN Server on Synology RT6600ax/RT2600AC Router
[Updated on 2/2, 2025, after setting TailScale on RT2600AC and seeing this post]
TailScale is great VPN. It is even greater if it runs all the time on a router! Currently it is available as 3rd party package for Synology NAS (X64-based) machines, but not for Routers (usually ARM64-based). *sigh* This blog talks about a way to set it up.
Grab the binaries
- Go to the TailScale web page for synology prebuit packages
- Find the one for DSM7 and for ARMv8 (arm64)
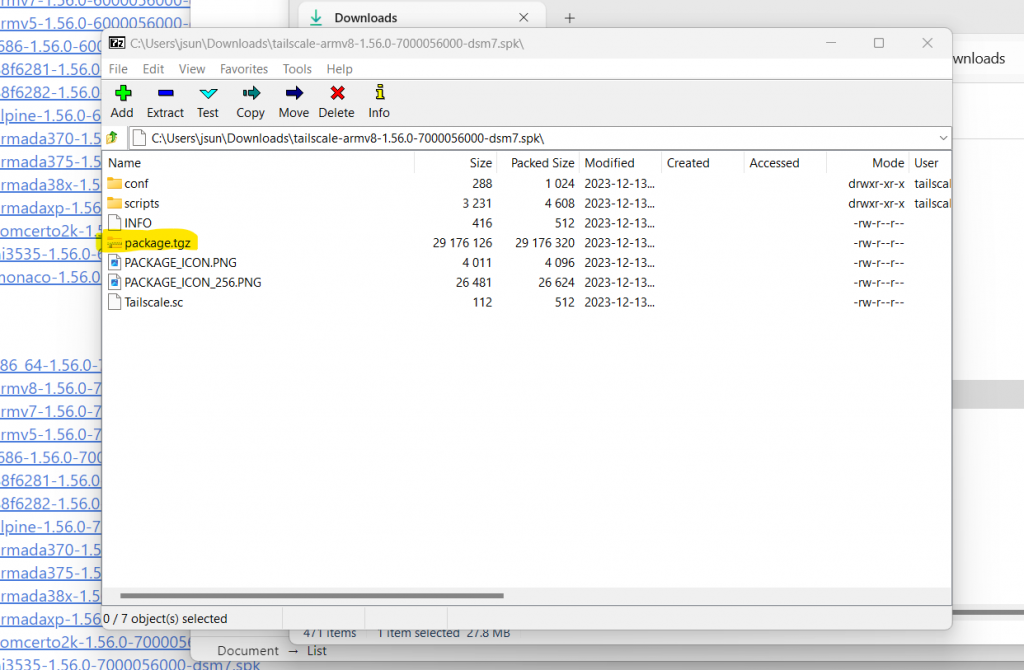
- Today this package is tailscale-armv8-1.56.0-7000056000-dsm7.spk, ARMv8 (arm64)
- Note for RT2600AC we need to choose the armv7 version (32bit arm)
- Untar or unzip the package a couple of times and extract two binary files, tailscale and tailscaled. See pictures below.
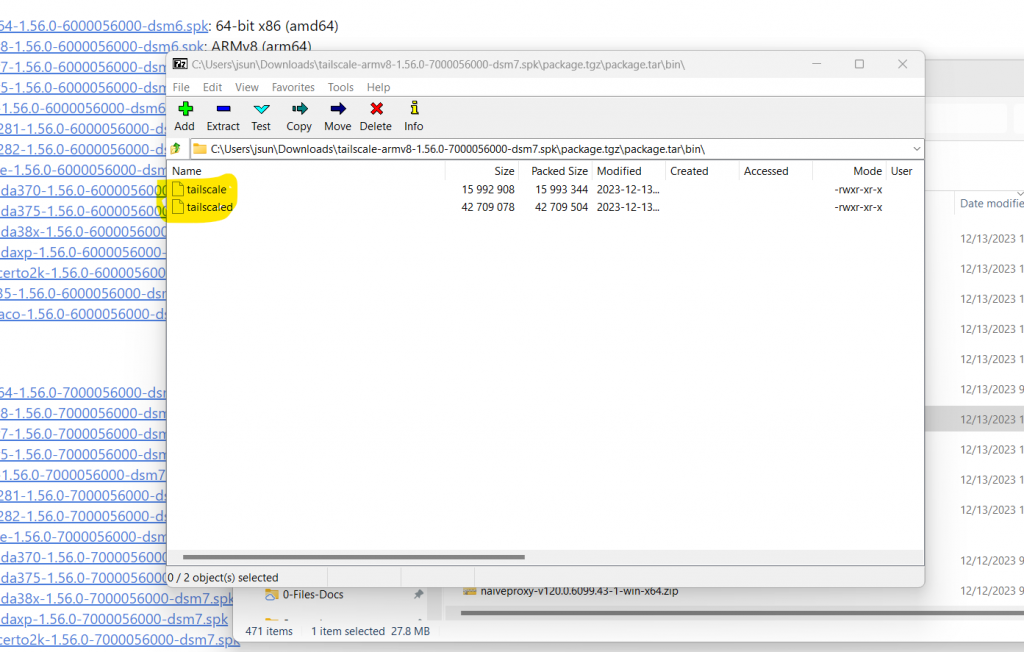
- Copy (scp) over these two files to Synology router, say under your home directory’s subdirectory, “tailscale”.
Testing
- Download the script below that starts/stops the tailscale daemon
- This script is derived from TailScale’s original script and is adapted to SRM environment
- MODIFY SCRIPT with your own path for PKGVAR variable
- Now type “./start-stop-status start” and “./start-stop-status status”
- For the first time running, type “./tailscale --socket tailscaled.sock up --advertise-exit-node --advertise-routes 172.30.1.0/24″ and perform web-based login/setup, which will
- connect to your tailscale account and join your VPN network;
- advertise itself as exit node (router to internet) (if needed);
- route traffic to nodes on its own subet.
- Refer to my previous post.
Start up TailScale automatically
This only works on RT2600AC!!
- Create /etc/rc.local
#!/bin/sh

/var/services/home/jsun/tailscale/start-stop-status start
Following method should work on RT6600AX, but it does’nt. Please help!!
- Copy the start-stop-status script to /usr/local/etc/rc.d/ directory
sudo cp start-stop-status /usr/local/etc/rc.d/tailscale Set Up TailScale VPN Server on AWS
TailScale website has an excellent collection of documents. I just want to quickly jot down what I did for simpler reference later. A couple of notes:
- It runs on AWS EC2 instance (t3a.micro) with Ubuntu 22.04
- It is a server node, a.k.a. exit node in TailScale terms.
Install
curl -fsSL https://pkgs.tailscale.com/stable/ubuntu/jammy.noarmor.gpg | sudo tee /usr/share/keyrings/tailscale-archive-keyring.gpg >/dev/null
curl -fsSL https://pkgs.tailscale.com/stable/ubuntu/jammy.tailscale-keyring.list | sudo tee /etc/apt/sources.list.d/tailscale.list

sudo apt-get update

sudo apt-get install tailscale
First-time setup
We need to create an account first. Then we will be asked to login and make this machine as server, i.e., exit node.
sudo tailscale up   # perform web login
sudo tailscale up --advertise-exit-node
Log into TailScale website,
- click on the “…” setting button for the server
- select “Edit routing …” menu
- Check “Use as exit node” button.
Usage
To use for yourself, simply turn on tailscale on your phone/PC, and use the above server as the exit node.
To share the server with others, go to tailscale web portal and click on “Share …” button for the server.
Disable/remove TailScale
sudo systemctl disable --now tailscaled     # to disable

sudo apt purge tailscale # to uninstallSet Up Your Own NordVPN Meshnet VPN Server
China great firewall is having a dreaded effect on my decision whether I should go visit. With a typical hacker fashion I decided to roll my own sleeves and take the matter under my own control – set up my VPN servers.
A long story short, two solutions emerge, OpenVPN and NordVPN meshnet. Both have some commercial backing. So it is not exactly under my own control in some sense, but the solutions are all free. This article talks about NordVPN meshnet.
Set up VPN Server on AWS Ubuntu 22.04
I mostly follow this page that describes well. Below are the the commands I used.
<register nordvpn account>  # max 10 devices are allowed

sh <(curl -sSf https://downloads.nordcdn.com/apps/linux/install.sh)

nordvpn login --token
nordvpn set technology nordlynx
nordvpn set meshnet on
nordvpn mesh peer list

nordvpn mesh peer inv send <email>  # invite others

nordvpn mesh peer routing allow <peer node>  # allow others to connect and route

# to stop/disable nordvpn
sudo systemctl disable --now nordvpnd

# to uninstall nordvpn
sudo apt-get --purge remove 'nordvpn*'
Set up on Ubuntu Client
The primary source information is at this page. Below are commands I used
<register nordvpn account>

sh <(curl -sSf https://downloads.nordcdn.com/apps/linux/install.sh)

nordvpn login --token
nordvpn set technology nordlynx
nordvpn set meshnet on

# accept invitation, if using other's server
nordvpn mesh inv list
nordvpn mesh inv accept <email of Server user, if needed>

# connect and route internet traffic via meshnet VPN server
nordvpn mesh peer list
nordvpn mesh peer connect <server node>

# status and disconnect
nordvpn status
nordvpn disconnect
Set up Android Client and Other Clients
- install NordVPN Android app
- Sign up and/or log into NordVPN account
- (optional) If using others’ VPN server, accept their invitation first
- Then follow this page to start VPN
Other platforms are most likely similar, but I have not tried them. See iOS page and macOS page. Note if you use someone else’s VPN servers, you will need to accept their invitation first so that you can see their servers on your peer list.
Also note NordVPN is mixing meshnet features with their own paid VPN services, which make the UI very confusing. Just follow this guide and steer clear from the paid subscriptions.