[Updated on 2/2, 2025, after setting TailScale on RT2600AC and seeing this post]
TailScale is great VPN. It is even greater if it runs all the time on a router! Currently it is available as 3rd party package for Synology NAS (X64-based) machines, but not for Routers (usually ARM64-based). *sigh* This blog talks about a way to set it up.
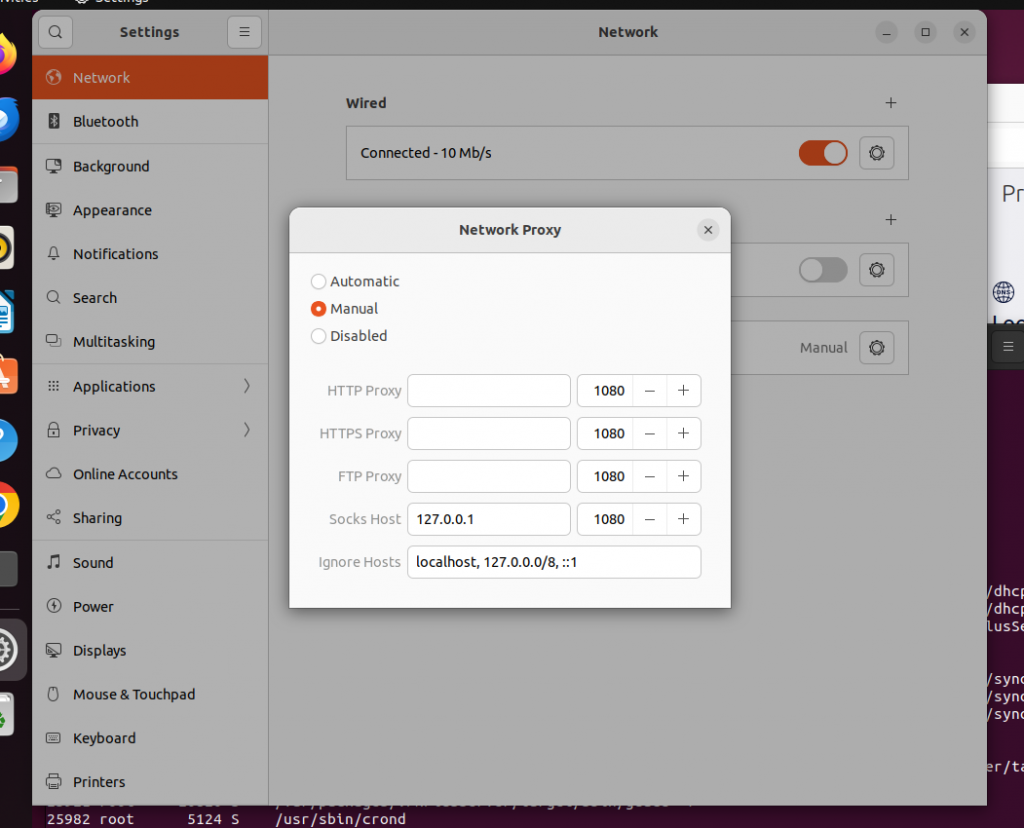
Note for RT2600AC we need to choose the armv7 version (32bit arm)
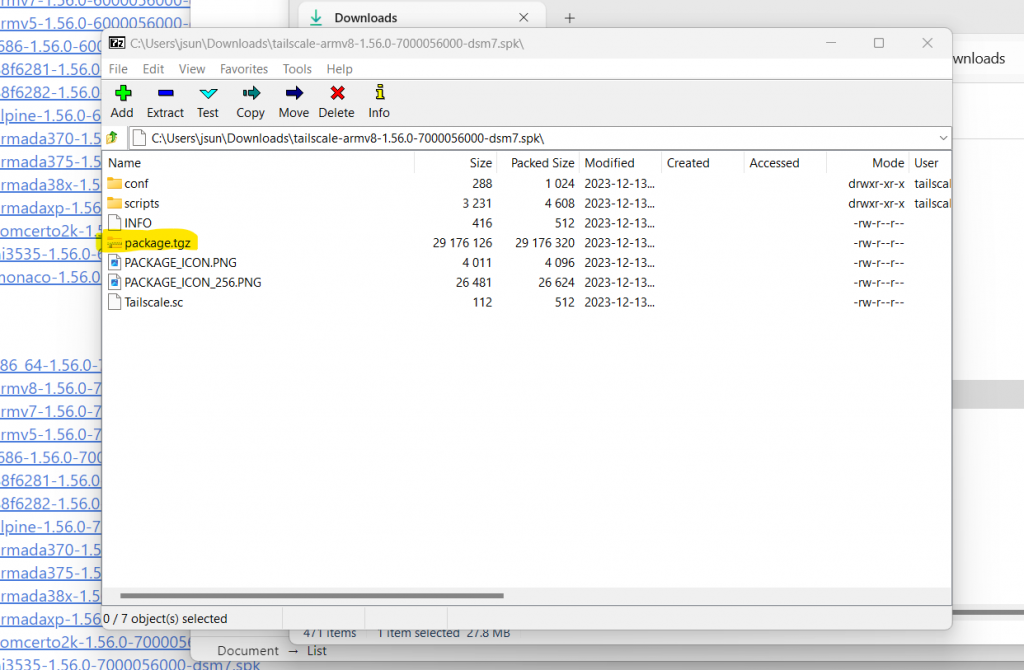
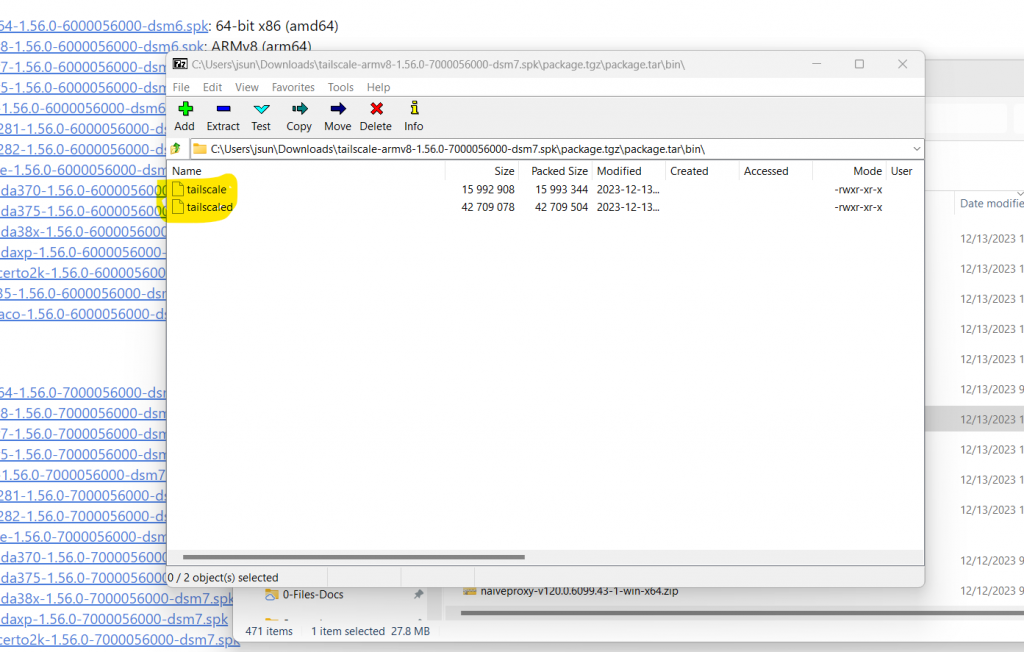
Untar or unzip the package a couple of times and extract two binary files, tailscale and tailscaled. See pictures below.
Copy (scp) over these two files to Synology router, say under your home directory’s subdirectory, “tailscale”.
Testing
Download the script below that starts/stops the tailscale daemon
This script is derived from TailScale’s original script and is adapted to SRM environment
MODIFY SCRIPT with your own path for PKGVAR variable
Now type “./start-stop-status start” and “./start-stop-status status”
For the first time running, type “./tailscale --socket tailscaled.sock up --advertise-exit-node --advertise-routes 172.30.1.0/24″ and perform web-based login/setup, which will
connect to your tailscale account and join your VPN network;
advertise itself as exit node (router to internet) (if needed);
It’s pretty stupid and annoying (maybe intentional?) that AWS provides DNS service (Route 53) but does not provide dynamic DNS to its own instances!!! This blog describes a method to achieve just that with various AWS features, namely EC2 instance events, Lambda functions and Route 53.
Specifically,
You must already host some domains with Route 53
You like to launch EC2 instances with public IP addresses
You like to assign some cool domain names to those EC2 instances, automatically
When those instances are stopped, you like those domain names are removed automatically
I have done this for over 5 or 6 years now. The blog is an attempt to capture what I did and keep my memory fresh! The approach was based on some early articles, most likely an early version of this one. However, I spent time to develop my own version which has diverged significantly now. For example, my version supports multiple domains and doesn’t use database. Also my blog will focus on using AWS console operations instead of using CLI.
Usage
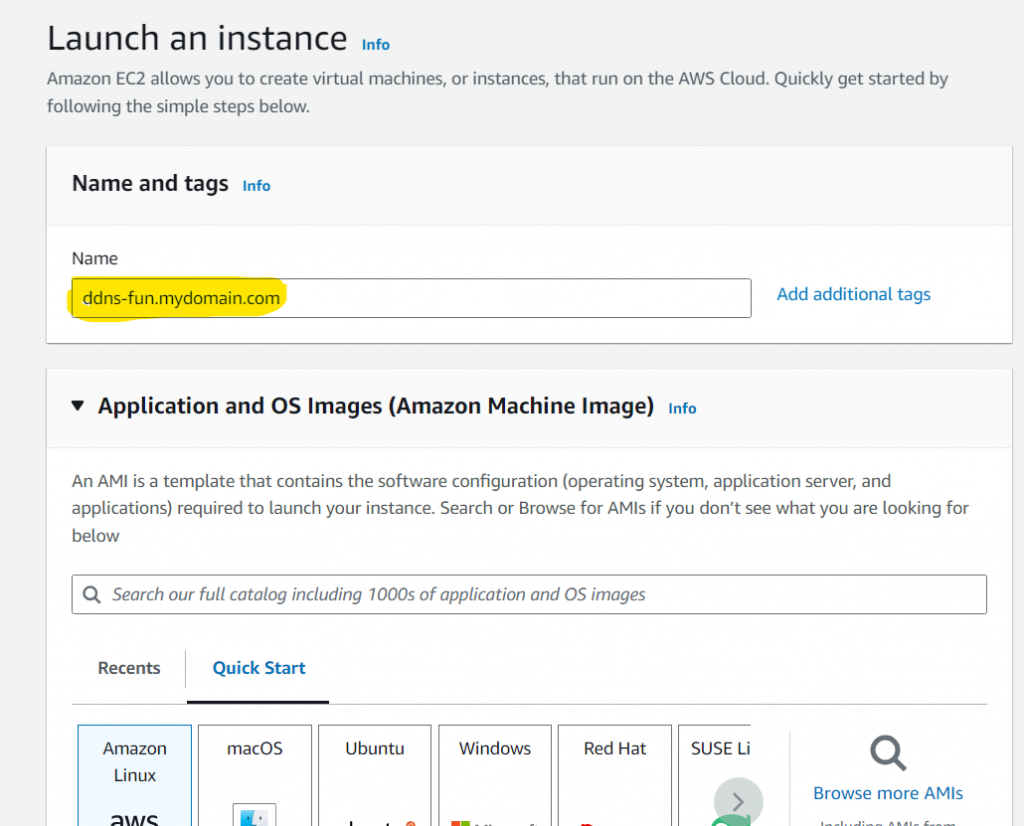
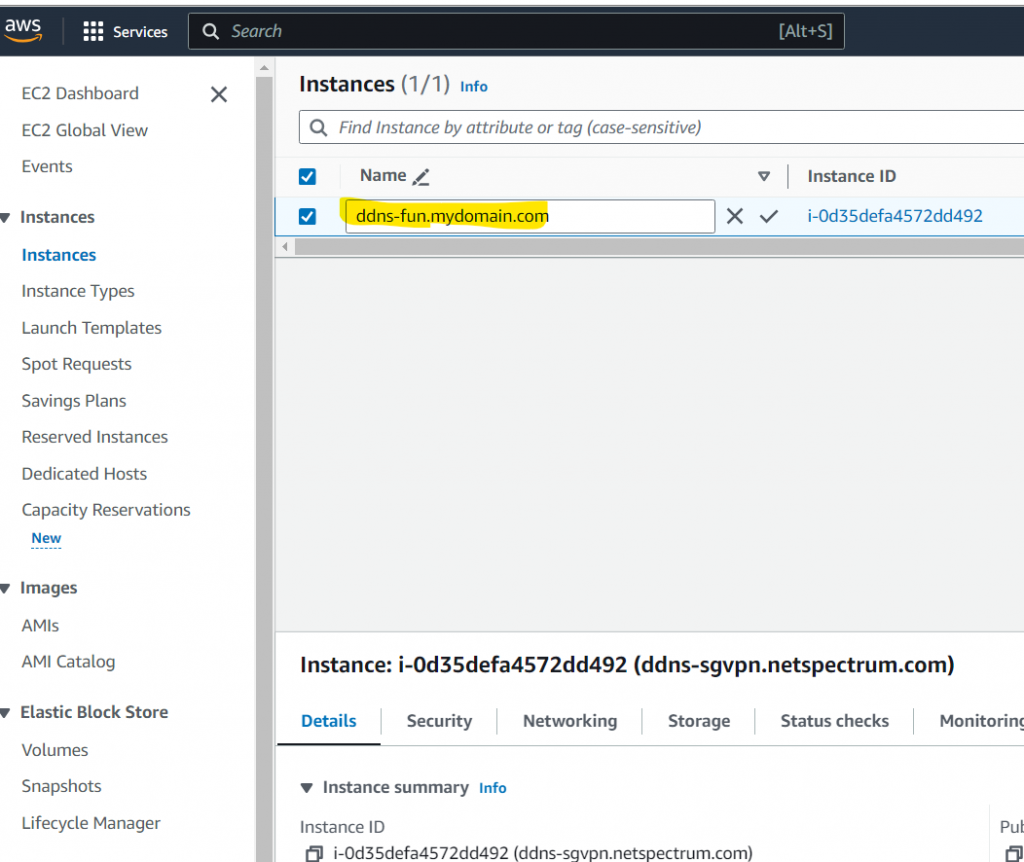
Suppose you own a domain called mydomain.com and you are hosting it with Route 53. When you launch an EC2 instance, you can set the name tag as “ddns-fun.mydomain.com” during launch or startup time. See pictures below. After the instance starts running, you will automatically have a A-type DNS record “fun.mydomain.com” pointing to the instance’s IP address.
During EC2 launch
After EC2 launch
When you stop or terminate the instance, the DNS record will be removed automatically.
Overview of the process
It is relatively complicated. Below is an overview.
The central piece is a lambda function written in Python 3.x called ddns_lambda. This function will receive events when EC2 instances are started or stopped. It will examine the name tag or DNS records to determine whether it should add some DNS records or remove them.
In order for the ddns_lambda to run with right permissions and access the recourses, you will create an IAM policy, called ddns-lambda-policy and an IAM role, called ddns-lambda-role.
Lastly you will create an event triggering rule that monitors EC2 instance start/stop. When such event happens, ddns_lambda function will be called.
Let us dive in!
Create a policy for DDNS lambda role
Go to AWS/Services/IAM/Policies
Click on “Create policy” on the top-right
On “Specify permissions” page, choose JSON option and enters following code. The policy allows access to ec2 instance query, write logs, and full access to route53.
China great firewall is having a dreaded effect on my decision whether I should go visit. With a typical hacker fashion I decided to roll my own sleeves and take the matter under my own control – set up my VPN servers.
A long story short, two solutions emerge, OpenVPN and NordVPN meshnet. Both have some commercial backing. So it is not exactly under my own control in some sense, but the solutions are all free. This article talks about NordVPN meshnet.
Set up VPN Server on AWS Ubuntu 22.04
I mostly follow this page that describes well. Below are the the commands I used.
<register nordvpn account>  # max 10 devices are allowed

sh <(curl -sSf https://downloads.nordcdn.com/apps/linux/install.sh)

nordvpn login --token
nordvpn set technology nordlynx
nordvpn set meshnet on
nordvpn mesh peer list

nordvpn mesh peer inv send <email>  # invite others

nordvpn mesh peer routing allow <peer node>  # allow others to connect and route

# to stop/disable nordvpn
sudo systemctl disable --now nordvpnd

# to uninstall nordvpn
sudo apt-get --purge remove 'nordvpn*'
Set up on Ubuntu Client
The primary source information is at this page. Below are commands I used
<register nordvpn account>

sh <(curl -sSf https://downloads.nordcdn.com/apps/linux/install.sh)

nordvpn login --token
nordvpn set technology nordlynx
nordvpn set meshnet on

# accept invitation, if using other's server
nordvpn mesh inv list
nordvpn mesh inv accept <email of Server user, if needed>

# connect and route internet traffic via meshnet VPN server
nordvpn mesh peer list
nordvpn mesh peer connect <server node>

# status and disconnect
nordvpn status
nordvpn disconnect
Other platforms are most likely similar, but I have not tried them. See iOS page and macOS page. Note if you use someone else’s VPN servers, you will need to accept their invitation first so that you can see their servers on your peer list.
Also note NordVPN is mixing meshnet features with their own paid VPN services, which make the UI very confusing. Just follow this guide and steer clear from the paid subscriptions.
CPU2006 is an old obsolete benchmark. But in modern days we may still need to build and run it. The biggest problem is usually in building the tools needed by benchmark itself, called spec tools.
Below are the steps I used to build spec tools for AArch64 (64bit ARM) and RISC-V 64 on Ubuntu OS (22.04 and 23.04).
I have set up rocket pool Ethereum staking node for about 1 month now. I have to say the experience is relatively smooth and the support is great. In fact it is so smooth, setting up the node itself is not worth a blog. 🙂 So far it has already produced its first block.
The only issue is the upload bandwidth concern. It was using almost 5mbps, about half of my ISP service allowance. While technically this is fine, I feel I would be comfortable if I have more headroom. Plus, I plan to add minipools. So I looked around and found that I could reduce number of peers to reduce bandwidth. However, there is very little information on how much bandwidth can be reduced when you reduce number of peers. So I set out to do an experiment.
My ETH1 client is Besu (Java) and my ETH2 client is Lighthouse (Rust). BTW, I’m choosing clients purely based on the programming language.
By default Besu has 25 peers and Lighthouse has 80 peers. In week 1 of the experiment, I used the default peer numbers. In week 2, I reduced Eth1 peers to half, 13 peers. That did not yield too much bandwidth saving. In week 3, I reduced Eth2 peers to half, 40 peers.
See results below. The numbers are taken from router. Note I only focus on upload bandwidth, not only because that is the issue of concern, but also I have highly variable download bandwidth and the numbers are not reliable.
Rocketpool pool uses about 75% of total bandwidth. So the true percentage change is amplified by 33%. From the table it seems we can save about 25% upload bandwidth of Ethereum staking node when we slash peers to half for both ETH1 and ETH2 clients.
week
week 1
week 2
week 3
ETH1 (Besu) peers
25
13
14
ETH2 (Lighthouse) peers
80
80
40
total upload (GB)
327.4
312.1
266.4
daily upload (GB)
46.8
44.6
38.1
mpbs
4.33
4.12
3.52
% against week 1
100%
95%
81%
staking node %
100%
93.5%
75%
PS – A few weeks later, I added a second minipool. I was expecting the bandwidth increase. However, the daily upload bandwidth actually dropped to about 27.5GB (2.55mpbs). This is puzzling. It could be due to the drop of actual peers connected (which is around 33 now). Or it could be due to “maturing” nodes or connections? In any case I’m happy upload bandwidth does not appear to be an issue anymore. And most likely I will create 2 more minipool after the Ethereum Shanghai upgrade and Rocketpool LEB8 introduction.
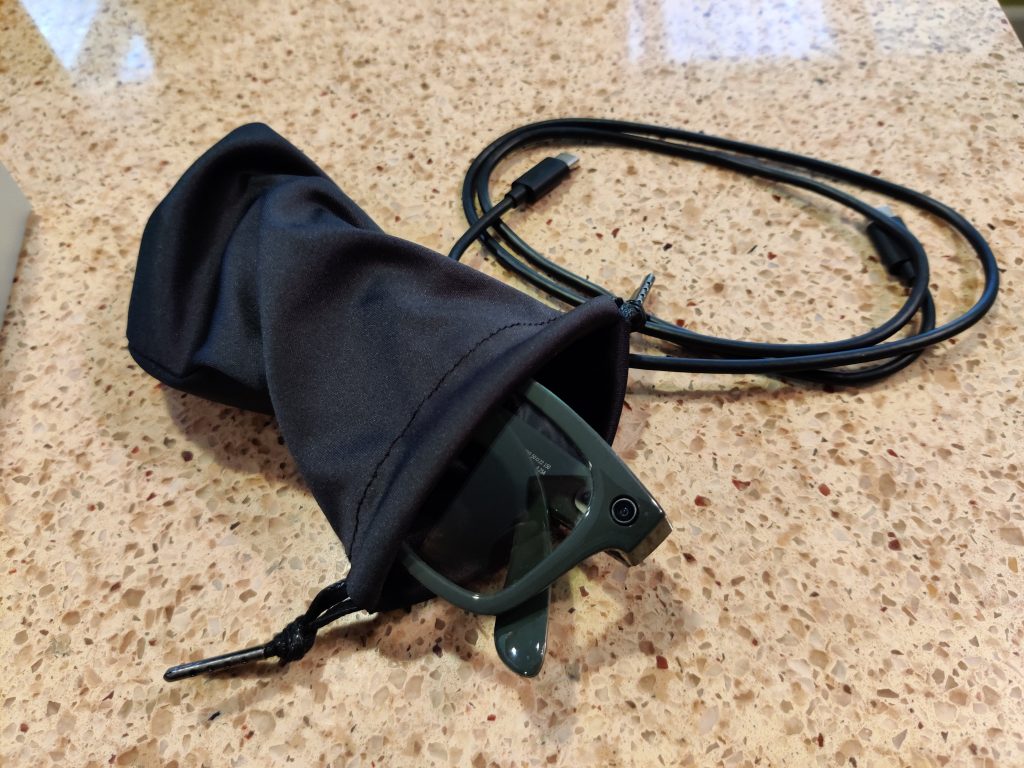
Ray-Ban Stories is a smart sunglass product that is co-developed by Ray-Ban and Facebook (now called Meta). Yesterday I got one pair of them and tried it on for about one hour. This post summarizes my experience of setting it up, wearing it, using it and interacting with the app (“Facebook View”).
Unboxing
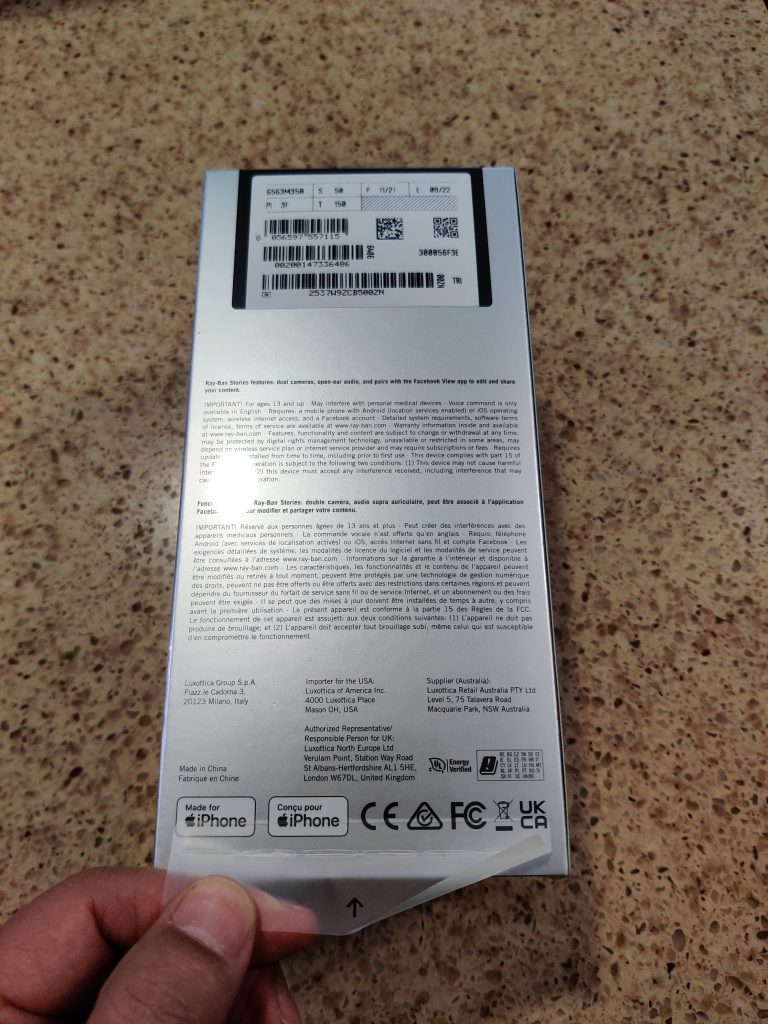
I was very impressed by the little details for unboxing. The shipping box can be used for return shipping, with returning address label included. The plastic wrap has a tab for tearing it apart. I have never seen that before! Similarly there is a tab for tearing a sealing label on the box. No more hassle looking for a knife or a pair of scissors!
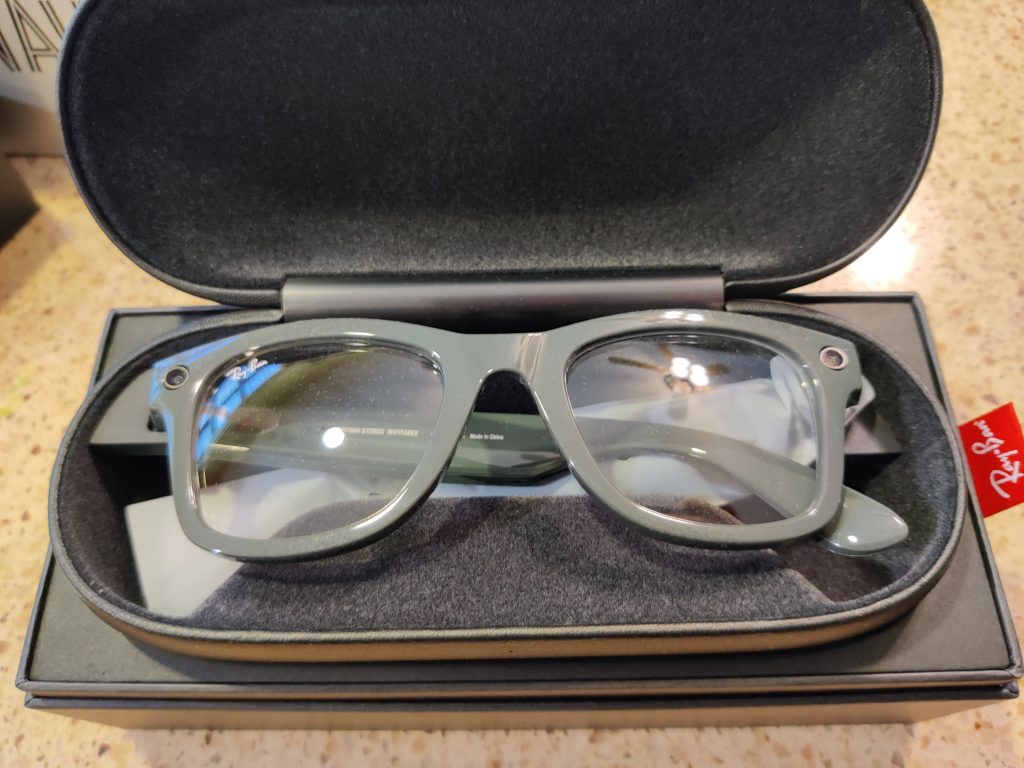
The packaging felt premium. Not bad for a device sold for $299. Mine is actually $379 due to the transition lens. It came with a USB type-C cable and a charging case. That is pretty much it.
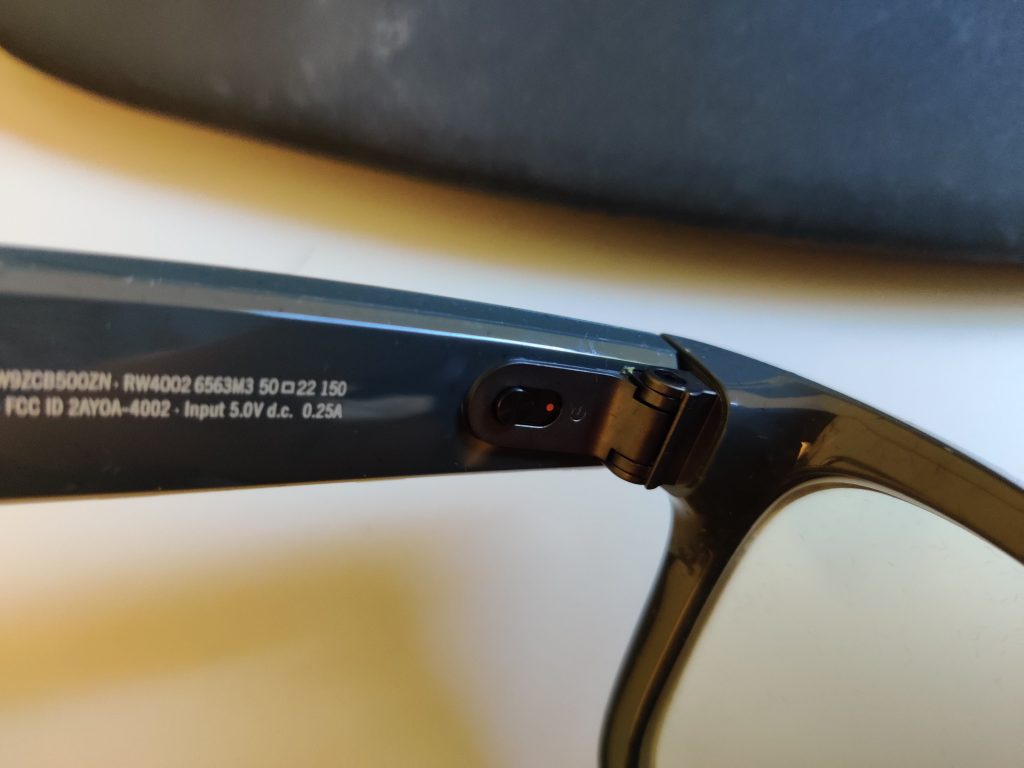
Tuning On
The tutorial guide was very illustrative. The first step is to turn on the device with a switch at the left corner of the glass (see pic below)
The initial BT pairing proved to be a disaster. The glasses refused to enter blinking blue LED mode. Several tries later it entered a blinking white LED mode, where BT pairing obviously cannot succeed. From there on, nothing seemed to work. I had to search online to do a factory reset. Skipping some details here, I believe I actually did a reset. BT pairing eventually worked as expected.
The app then wanted to do a firmware upgrade before anything else, which is kind of expected. However it complained about not enough battery. So I had to charge the glasses for another 20 minutes, a big laydown for an enthusiastic user.
Wearing the glasses is pretty comfortable. It does not feel like a burdensome gadget. The arms do feel a little rigid and thicker than normal. (ADDED on Dec 6th : the glasses tend to slip down. I ordered a nose pad set which hopefully can stop that.)
Using the Glasses
Glasses can be controlled by either voice (“hey, facebook. take a photo”) or pressing a button + tapping the arm. I found they are relatively intuitive.
I will cut it short and go straight to the likes and dislikes. Below is a list of likes:
App has a good tutorial guide
App has an easy montage feature to combine several video clips, even with music
App also has a flashback feature for animating a picture. I probably need a few more practice to master it.
It has a verbal warning when battery drops to 10%
Generally good image/video quality, except when taking shots indoors, perhaps due to low light
Phone can still communicate and control the device while it is being charged. Good.
Here are a few dislikes:
Is the initial BT pairing failure due to glasses already paired somehow? If so, would need a better cue to lead users. Factory resetting a device which is just out of box seems really harsh for an end user.
Not enough initial battery to do the initial firmware update. Must wait for 20 minutes before playing with it.
Why can’t we update the firmware while charging it? that should give sufficient power.
App has a “Facebook View is active” notification that is always on. What is the purpose? Tapping on it does not even bring up the app.
Instead, I might need a notification to remind me about the battery level of the glasses and turning it off if necessary.
ADDED on Dec 6th: After 2 days, I found this notification is REALLY annoying. It is there. It cannot be dismissed. And it is completely useless!
Using voice to stop the video recording is a little strange. There is no audio prompt after saying “Hey, Facebook”.
I myself don’t know whether a video recording is on or not. This is not a big problem because you can only record a 30-second clip and typically you will master the recording after a few trials.
Sometimes there is a audio sound played shortly after stopping a video. I still don’t understand what that is. Maybe telling me processing is done and I can start recording again? That sound does not always come.
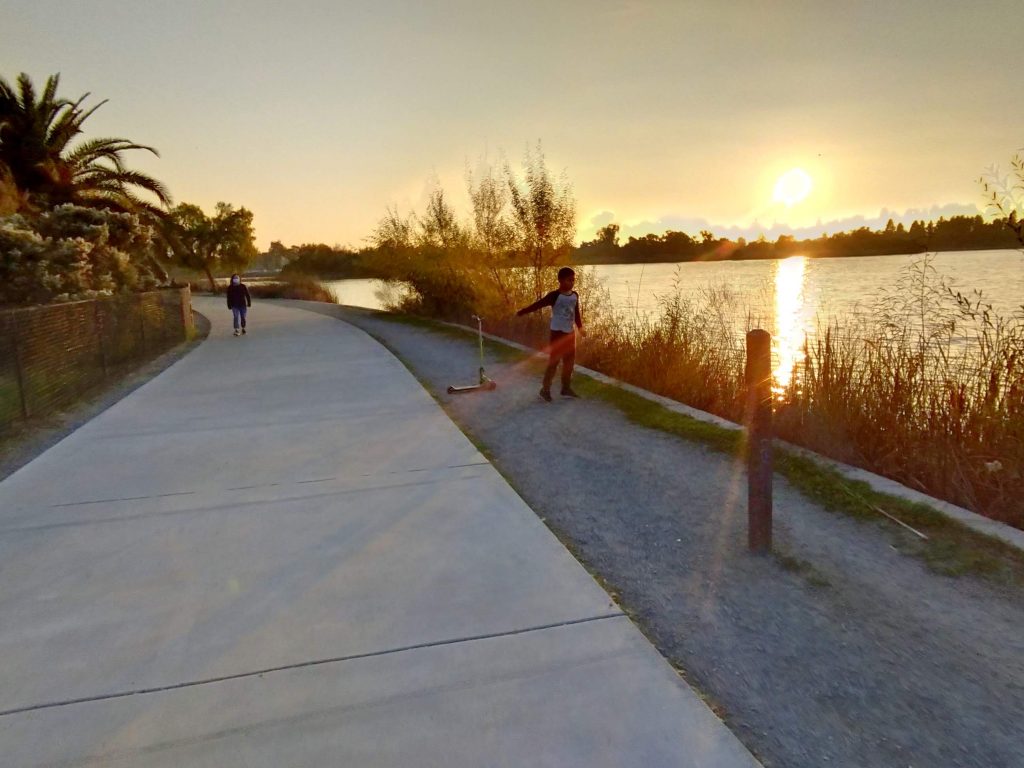
Below are some pictures taken during that session. (Somehow I could not share the video due to WP limitations. *sigh*)
Last Words about Battery
I played with it intensively for about 1 hour and used up all the 34% of battery. During that period, I took 19 video clips (380 seconds total) and 17 pictures. That seems to be consistent with Ray-Ban website claiming about 6 hours of moderate usage and 3 hours continuous usage.
I often have a need to save the output a bash file to another file, e.g., log file. I know I could use redirection “>” or “tee”. But I would have to type it from command line. This post talk about doing it from within the script itself.
Google search does not yield much meaningful results. To save the hassle for me and potentially others. Here is the straight no-BS code.
I just made a donation of 15 ADA to Cardano Forest project. I like share my experience and some thoughts.
The process is relative simple:
View the project page on web browser,
Click the donate button and copy the receiver address
Then switch to Yoroi wallet app on the phone
Click “Send” button, paste the receiver address, enter 15 ADA and click “continue” finish the sending.
First, this is really just a payment use case, which in theory it should not be too much different from, say, a PayPal-enabled transaction. However, there are 3 important differences.
No intermediary party needed. It is just one address paying another address. No platform company like PayPal or banks needed to facilitate the transaction.
No personal information exchange. None of email, name, or phone number get exchanged.
NFT token to ensure tracking of your donation to the true beneficiary. You will get a NFT token for every tree planted. Each ADA will plant 1 tree. People can still make flaws here, but the whole process is definitely more transparent and more trackable.
You can find out more at their web site. It is a good cause, and I encourage everyone to donate, not only for the cool and new experience, but also for its cause.
A few wishes that would make the experience even better.
I wish there is a “pay” button from the donation web page which triggers Yoroi mobile app directly. This is more of Android/iOS issue.
I wish the receive address and related qr code can embed the ADA amount, and perhaps even a short memo.
I wish Yoroi mobile app can scan a QR code from a picture, which is useful when you have the mobile phone for both web viewing and QR code scanning.